

Welcome back to BMTV! This week, Mark from Pioneer shows us the Qualatex-approved method of creating consistent, even 5-balloon bouquets. This will even work with a mixture of foil and latex balloons! This system is great as each of the balloons are tied down during inflation, so if you are interrupted by something (maybe a customer comes in or the phone rings!), then the balloons won’t be sitting on the ceiling which could be damaging. Using this technique, multiple people can each make a bouquet and you can be sure that they are going to look the same when you put them together. Great for quickly decorating a venue or shop!
What you need
With any bouquet it’s important that all your balloons and ribbons have a consistent colour scheme, so to start with Mark prepares the ribbon and weights that he will need. As Christmas is just around the corner; we selected a red and green theme with a red gift box weight that we covered in green ribbon to make it look like a little present! You will need a good sized weight to hold this bouquet down, so anything weighing 100g and above should be plenty. Mark cuts 5 lengths of ribbon (3 red and 2 green) and attaches them to the weight. He doesn’t measure them out at this stage as he has a little tip: Ribbon is cheaper than your time, so if it’s quicker to cut all your ribbons to a standard length and trim them down later. This way you will be saving yourself money. You can always use the offcuts to wrap another gift box weight or add them to another decoration.


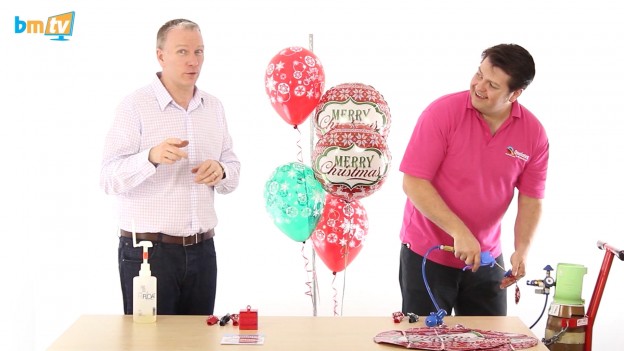
The balloons we have chosen to match the festive theme include the follwing: 3 11″ Assorted Christmas! Snowflakes Latex Balloons (2 red, 1 green) and 2 of the 18″ Merry Christmas Nordic Pattern Foil Balloon, both from Qualatex of course! As Mark is using a mixture of foil and latex balloons in this design, he Hi-floats the three latex balloons so they will stay floating for the same amount of time as the foils. Usually we give the conservative estimate of 8-12 hours float time for a normal latex balloon, but Mark says a Qualatex latex balloon will float for 18-24 hours. While this is still an impressive float time, foil balloons will stay floating and looking good for 3-5 days! So, to avoid three-fifths of the bouquet being on the floor the next day, we highly recommend Hi-float. At the time of writing, the bouquets that Mark made for BMTV have stayed inflated and still look good even a week later!
Mark has a trusty pole and base that he has measured 5 points onto. He has marked each point with cuts of ribbon, and each one is spaced 7 inches apart, with the lowest marking point measuring 29 inches off the floor. Mark takes this portable pole everywhere, but if you don’t have your own pole and base, you can always measure these points up a door-frame or along a table. The reason Mark has measured the points 7 inches apart is that an 11 inch Qualatex latex balloon is 14 inches from top to knot when fully inflated. An 18 inch Qualatex foil balloon actually shrinks down when inflated, and is also 14 inches from top to neck. This means that a 7 inch distance between points will make each balloon sit exactly half-way up the balloon below, whether you use foil or latex.


Inflating the Latex
So enough chit-chat, let’s get inflating! Mark starts with a red latex balloon. This he inflates it to 11 inches using a trigger valve attached to a helium cylinder with a 3ft extension hose with a quick release connector. To measure it, he uses a yellow box balloon sizer. Next, the trick is to keep hold of the neck of the balloon once inflated, and measure your first ribbon up to the lowest point on the pole. Make a fold in the ribbon and tie the balloon into the line at the fold. To do this, scissor over the knot and the ribbon with one hand, placing your thumb on-top of the scissors. This will hold the neck of the balloon shut. Next, stretch the latex neck out and wrap it around your hand and the balloon. Push the knot in-between your index finger and thumb, and push the latex off by bending your fingers up.


The ribbon will be tied into the neck of the latex at the point of the fold, but the beauty of tying the ribbon into the neck is that you can slide the balloon along the line if the balloon isn’t in the right place. Simply cut the excess ribbon and curl the tail with scissors to complete the first balloon. Repeat this process for your second balloon on the second mark point (we used a green latex and red ribbon for this one) and then it’s onto the foil balloons.
Inflating the Foil
For these we are using an auto cut-off foil inflator; you can use a universal or foil inflator for this if you have one. Inflate the foil balloon fully and make a fold with a green ribbon on the third marking point. To tie the foil, simply fold the neck over the ribbon and roll the neck up to the base of the balloon. Tie the ribbon twice to secure the roll in place. If you find it hard to tie the foil balloons, you can sandwich the balloon between your body and a smooth surface like a table to free your hands for tying. Cut the excess ribbon and curl, repeating this process for the second foil and fourth marking point.


Finish off the last latex at the top marking point with a red ribbon. We’ve used green ribbon for foil and red for latex, but you could stagger the colours evenly, whatever you choose! So there you have it, a beautiful-five balloon bouquet that you can make consistently every time.
That’s it for this week; if you have any pictures to show us then please send them in!
Rob
As always, you can get in touch with us by commenting below, sending us an email or commenting on Facebook and Twitter. If you would like to receive these weekly video updates, you can either keeping checking this blog, subscribe to email updates in your account settings or you can subscribe to our Youtube channel.