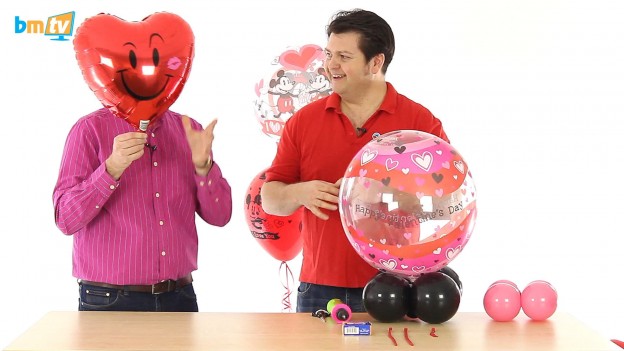
This week we welcome back Mark Drury from Pioneer Europe, who is going to show us how to make a “Naughty Kiss” balloon character for Valentine’s Day. Not only this, but he also has some important tips on improving the perceived value on your balloon decorations.
Naughty Kiss Character
This cute, air-filled character design was created by Sue Bowler and is made out of a Naughty Kiss 18 inch foil, a Valentine Bubble Balloon, some 11 inch Black balloons, 5 inch pink balloons and red 260Q modelling balloons. This is only the colour scheme we used, so there’s endless potential for designs to suit other occasions as the principle will remain the same.
First thing to do is make the base: Inflate the 11 inch black balloons to 6 ½ inches and tie them into duplets. When you reduce a balloon that much, the shine can often be lost and the balloons will look dull and more matte than before. To counter this, Mark squeezes each of the balloons at the knot end to stretch the latex around the inflated portion of the balloon; this should give them a bit of a shiny finish! Next, tie the two duplets together into a quad. To weigh down the character, Mark uses a water-weight which is simply one balloon inside another, filled with water from the tap. Tie this off and you have a quick and inexpensive weight! Tie it into the base by stretching the neck of the water-weight out and wrapping it around the 4-balloon-cluster.
Next we roll tie a piece of 260Q balloon into the Valentine’s Day bubble and secure the 260Q into the cluster base by stretching the latex out, and wrapping it around each of the balloons. We need to secure another piece of 260Q to the top of the bubble, and to do this Mark uses Balloon Bond to stick the 260Q along the seam of the bubble. This will create a super-strong attachment point, as the balloon bond is even strong enough to hold the hold weight of the base!
The next step is to create a 4-balloon-cluster with the 5 inch pink balloons and secure it into the 260Q on the top of the bubble. Roll tie another piece of 260Q into the neck of the foil head, and attach this to the pink cluster you’ve just added. You could just leave the character like this but we are going to add arms!
The arms are made out of two red 260Q balloons by creating a pinch twist and a loop twist. Check out our video on how to do this here. Measure the arms next to the character and trim them down if necessary. To trim the 260Q balloons, make a twist where you want the balloon to stop, cut the end of the balloon and tie it to secure. Once both of the arms are measured, tie them together making sure to leave a bit of a gap between the two arms so you can secure them in the 5 inch cluster. To do this, drop the arms into the middle of the cluster and wrap one of the arms around the 5 inch balloon to secure it. You could manipulate the arms into poses if you want, but otherwise the character is finished! The great thing about this character is that he is air-filled. You could however remove the weight and fill the bubble and the head with helium if you want him to float!
Adding perceived value
Mark says that all the products available from Qualatex are beautiful balloons, but they are only worth a certain amount individually. If you put them together to make a larger creation (like our Naught Kiss Character!), you can make something that has a perceived value much higher than that of the individual balloons. This makes the sum of the parts more valuable to the end consumer than the individual parts.
For example, a staggered bouquet of balloons could be created by lots of shops, but you want to turn it into something that only you could do to attract more people into your shop. How can we improve on the original design? By adding little things here and there, Mark starts by adding a 260Q flower to the neck of the bubble balloon to make a simple collar. He then attaches three more 260Q flowers to a spiral 260Q to create three curled flowers. After that, he attaches each one to the ribbon below each of the balloons by pushing the ribbon into the folds of the flower-head.
That’s all for this week, see you next time!
Rob
As always, you can get in touch with us by commenting below, sending us an email or commenting on Facebook and Twitter. If you would like to receive these weekly video updates, you can either keeping checking this blog, subscribe to email updates in your account settings or you can subscribe to our Youtube channel.


