

Mark’s back this week to demonstrate the best way to inflate the Qualatex bubble balloons. He will take us through the range including single Bubble balloons, double Bubble balloons and (the decorators favourite) Deco-Bubbles! We really struggled to tie the latter when we first started out so if you’re having trouble as well then Mark will show you the proper technique!
If you are unfamiliar with Bubble balloons, they are made from a stretchy plastic material instead of the traditional foil or latex. The idea behind them was to create a balloon that has the seamless design or pattern that was possible with a latex balloon but with the extended float life and self-sealing valve that comes with a foil balloons. Qualatex have, in fact, exceeded in both those areas as the float time is well in excess of foil balloons and there is a wide range of great Bubble designs. From classic character Bubbles like Mickey Mouse, to solid colour printed patterns or even the great Double-Bubble balloons that have a balloon inside a balloon! Where the Bubbles excel with balloon decorators is with their Deco-Bubble range.


All Bubble balloons are supplied in a sealed “wet pack”. This is a packet with a moisture cloth inside that prevents the balloon from drying out. Bubbles need to be slightly moist when you inflate them so if you have a lot to inflate, it is a good idea not to open them all up at once as they will start to dry out. If you have opened a Bubble packet and found that you don’t need it, you can put it back in the packet with the moisture cloth and re-seal it with tape to keep the balloon fresh.


Inflating a single Bubble balloon
Single Bubbles have the self-sealing valve and come pre-attached with ribbon so you don’t need to worry about tying the neck at all. To inflate, just open them out fully and insert your inflator underneath the grey line. We are using a trigger inflator here but any latex inflator would be suitable for this. Inflate the balloon and watch for the creases along the seam of the balloon, you need to keep inflating until these disappear. The balloon will stretch and inflate fuller, more than you would normally expect! Don’t be afraid to keep going until the creases vanish. The Bubble shouldn’t be completely round, it should be slightly elliptical and you know if you’ve over-inflated the balloon because the print will become faded. You can hide the neck of the balloon with a collar or similar if you’d like.

Inflating a Double Bubble
The Double Bubble balloon is a balloon inside a balloon so we have two separate self-sealing valves; valve A and valve B. Valve A is for the main, outer balloon and Valve B is the inside shape. For lack of a better word we can call the inside shape the foil balloon. It isn’t actually made from a foil material but it inflates in much the same way as a foil balloon.


So to inflate a double bubble, start by putting a puff of helium inside Valve A to just open up the outer balloon. Next, using a foil inflator (we recommend the automatic foil cut-off valve) inflate the inner balloon to its full size using valve B. Always inflate the inside balloon first. If you inflate the outer balloon fully first, inflating the inner balloon can cause the outer to pop or give your automatic cut-off inflator a false reading, so it won’t inflate at all! To finish the balloon off, put your inflator back into the A valve and inflate the outside Bubble like you would a single Bubble.
Also, it is important to note that whether you are helium filling or air filling these, then you need to fill both the inside and outside balloon with the same gas. If you fill the inside balloon with air and the outer balloon with helium for example, the difference in pressure can cause the inside balloon to burst as the different gases will want to mix!
Inflating a Deco Bubble
The main difference between the Deco-Bubbles and the standard Bubbles is that these don’t have a self-sealing, this is because they are designed to be double-stuffed with other balloons so the aperture has to be open to allow you to fit a balloon inside. Obviously you will need to create a seal yourself once you have inflated the Deco-Bubble and this can be tricky to do if you don’t know how! We’ll show you the correct technique.
To start with, Mark takes the air out of a 160Q balloon to create a strong piece of material for tying the Deco-Bubble.


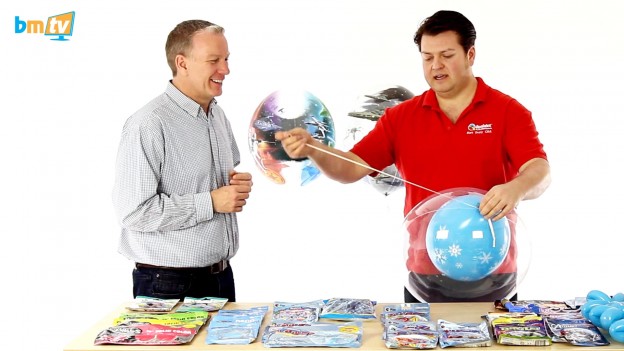
We are going to put an 11″ blue snowflake design inside the Deco-Bubble but you can put anything inside these including confetti or tulle, just make sure it has no sharp edges!
Mark puts a little bit of helium inside the Deco-Bubble to open it up and makes 3 or 4 folds in the latex balloon and this allows him to fit it inside the neck of the Bubble. Mark recommend against using a pen to push the balloon inside as it’s easy to damage the balloon or get ink on the inside and you can just push the balloon in or pull from the other side if you’re having trouble anyway. Next he slides the trigger inflator past the latex, creates a tight seal and inflates the outer balloon almost full. He leaves about an inch and a half of creases along the seam and keeps a tight hold of the necks so no gas escapes!


Next Mark inflates the inner balloon. He says that “if you are having trouble getting your inflator inside the latex balloon, put a puff of helium into the latex balloon as this will open up the balloon inside your fingers.” this will allow your inflator to go in easier.
After fully inflating the latex balloon, Mark twists both necks of the balloons together. He takes the pre-prepared 160Q and puts the the middle of the 160 onto the necks of the other balloons. He pinches all three together, stretches the 160Q out and then wraps it around the neck 6 times. You need to pull the 160Q out to the point where it is almost breaking when you’re wrapping it around. This stretches the latex so when you let go it will contract and form a tighter knot. If you don’t stretch the balloon out first then the balloon could stretch later on and gas may escape.


Once one end is wrapped round, Mark pinches the centre to stop the 160 from unravelling, then takes the other end of the 160Q and wrap it 6 times in the other direction. Next he ties the ends of the 160Q together using a standard double knot. If you want to, you can pull the neck of the latex balloon out and tie that around the necks as well to create a super-secure seal. Next you can attach ribbons to the 160Q and you could even add some colour coordinated 260Q flowers to finish off the design if you want to. Mark ties these on with the remainder of the 160Q because he says that a “latex to latex bond is less abrasive” than tying the flower onto the balloon using the ribbon.
That’s it for this week, I hope this has given you an insight into the different designs and types of balloon that make up the Bubble range. If you have any questions about how to tie or inflate these balloons, then get in touch! See you next time.
Rob
As always, you can get in touch with us by commenting below, sending us an email or commenting on Facebook and Twitter. If you would like to receive these weekly video updates, you can either keeping checking this blog, subscribe to email updates in your account settings or you can subscribe to our Youtube channel.